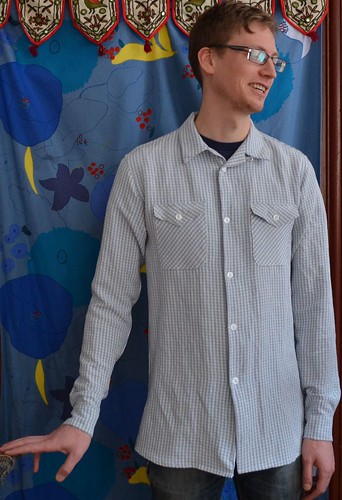
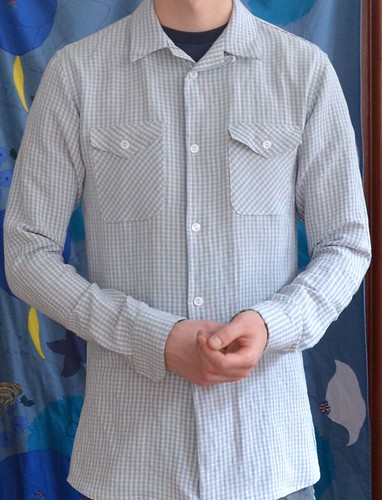
Ok, so crafting resolution #2 attempt 1! I've been wanting to make something for my boyfriend Josh for years now, and finally got around to it. I'm pretty pleased with it for a first try, though there are definitely some things that I'll change for the next try (primarily the length of the shirt body). Also I learned that not only am I bad at taking self timer shots of myself, but I generally suck at photography all around. For most of these pictures I stood way to close to Josh and since he's a good foot taller than me, they all ended up being lovely shots of up his nose. Sorry babe! I also didn't take that many shots since I felt bad about making him model (for no real reason since he was great about it) so had very few shots to pull from. New mini crafting resolution: become better at photography.
Pattern notes:
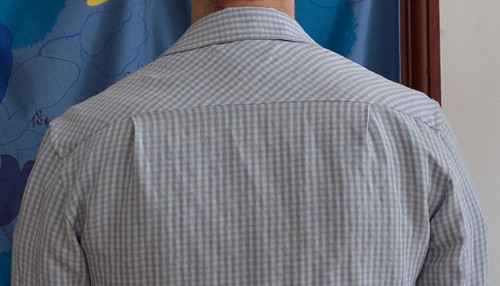
This is the Negroni pattern from Colette Patterns. I got this back in 2011, so it's been in my stash for a while. I didn't realize that it had a camp collar until I started making it! I think it works but I also want to make Josh a more traditional dress shirt as well, so if anyone has any suggestions let me know!
I used the medium for the most parts but lengthened the body to the xl. I did this because I was comparing the length to that of a shirt my boyfriend said was a good length on him but realized after it was done that long dress shirt = meant to be tucked, versus the short more casual style of the negroni. So that was one new lesson. I want to go back and shorten this shirt at some point.
The only other change I did was slashing and overlapping the sleeve at the midpoint to make it narrower, which was the only change Josh asked for from the muslin. I wasn't really sure at first how to go about doing that while still keeping the cuff and shoulder seams the same size since he was happy with them. After searching the internet the best I could come up with was the inverse of this technique (thanks internet!). I then trued the pattern and proceeded on my way. It seems to have worked but yeah, lots of guesswork in that pattern manipulation theory.
Sewing notes:
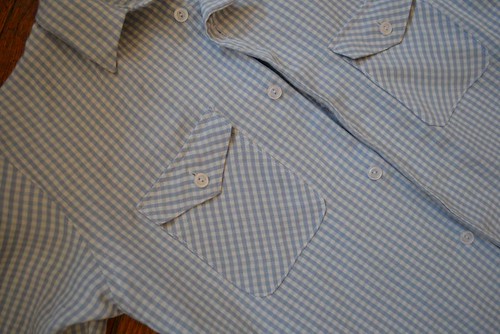
Lots of new techniques for me here but not many changes from the pattern. The only major failure was my flat felled shoulder seams. When it came time to press the shoulder seams to the body to be sewn down I messed up the previous pressed fold, and could not get it back as neatly because it was already sewn on. Next time I'm just going to finger press at this point. I think maybe I lack refined pressing skills!

Plackets! Kind of fun, kind of stressful. I bought an edge stitch foot after this project.
Fabric notes:
I've decided that items sewn for other people are exempt from my stash diet rules, and this was not a stash piece so it doesn't count towards my stash total. However of the 3 yards I bought for this project I ended up with about 3/4 of a yard left (single layer cutting!) so now that leftover counts as 'stash'.
Been really enjoying watching Project Sewn unfold, and have a couple ideas about the next themes so might submit to the sew along if I can get organized in time!